Setting up WordPress Website Online (cPanel Host)
In this guide, I will be sharing step-by-step guide on how to set up your WordPress website online.
In another article, I might share how to set it up on your local computer
Step 1 — Set up your Domain and Hosting Account
The first step is to purchase your domain name and hosting from a provider. You can use either Namecheap (namecheap.com), whogohost.com or GoDaddy.com. There are tons of other providers, however, I have used these and can recommend them.
- A Domain Name is yourbusinessname plus .com or .net, .org or .biz.
- Hosting is the space on which your website sits. If you intend hosting a large website, ensure you buy a bigger space. It is measured in Gigabytes (GB)
Once you purchase these, you will be provided with a link and login credentials that takes you to your cPanel (Control Panel) where you can set up your Database, Email and Upload your website.
Step 2 — Download the WordPress Framework
The WordPress framework is free and Opensource.
Visit www.wordpress.org, click Get WordPress at the top right corner
Click Download WordPress button on the next page

This will download a Zipped folder.
Step 3 — Upload the WordPress framework
Login to your cPanel. Click File Manager and open the folder called public_html. This is where you will be uploading the WordPress folder.
If you have an existing website on the host, create a folder inside the public_html and upload your files there.
To upload the WordPress file, Click “Upload” button at the top of the directory list. It will open in a new tab. Drag the downloaded wordpress framework or click “Select File” to upload the zipped folder in there.
Once it is done uploading, you can close the tab. It will appear in the directory list.
Extract the WordPress zipped file by clicking “Extract” button. This will extract the content into the folder.


If it extracted into another folder called “wordpress”, go into the folder and move the content out to the upper folder like this:


Delete the /wordpress folder so you still have your folder.
NB: I’m creating mine inside ‘clsmfellowship’ folder. In your case, you might just have /public_html after removing wordpress
Then click “Move Files”.

Step 4 — Setup your Database, the User and Assign Permission
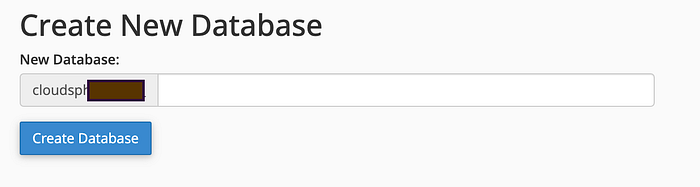
Go back to the root of your cPanel and click MySQL Databases.
In the next page, enter the name of the database in the Create New Database field and submit. On the next page, copy and keep the full Database Name
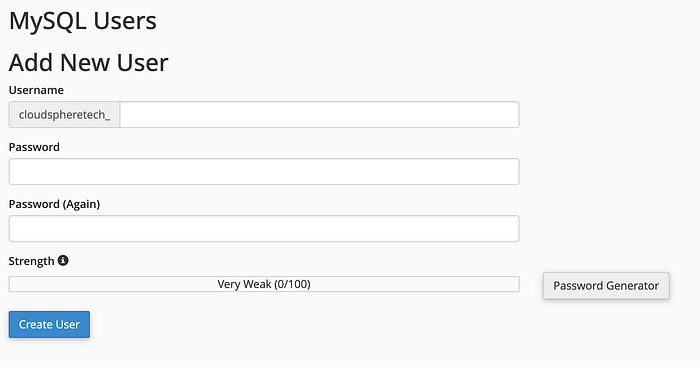
Create User: Go back. Below the page, Create a new Username and Password. Then Create User. As before, copy the full user name and keep it.
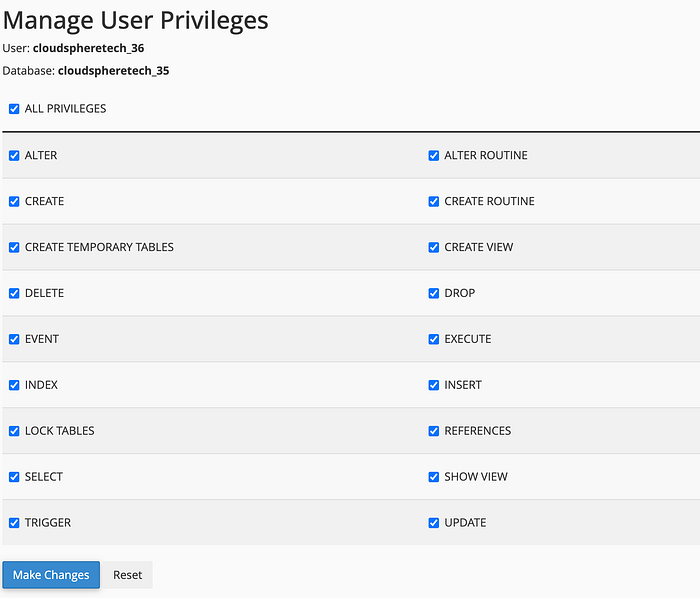
Set Permission: Go back. In this box below, select the database created and the user created in the respective fields and click “Add”.
In the next page. Select “All Privileges” checkbox and Submit
Now that all is set, let us connect our uploaded WordPress to the database.
Step 5 — Connect your WordPress to the Database
Now you can visit your website in the browser.
If you uploaded to a sub folder, ensure to use /folder at the end. It will take you to this page below
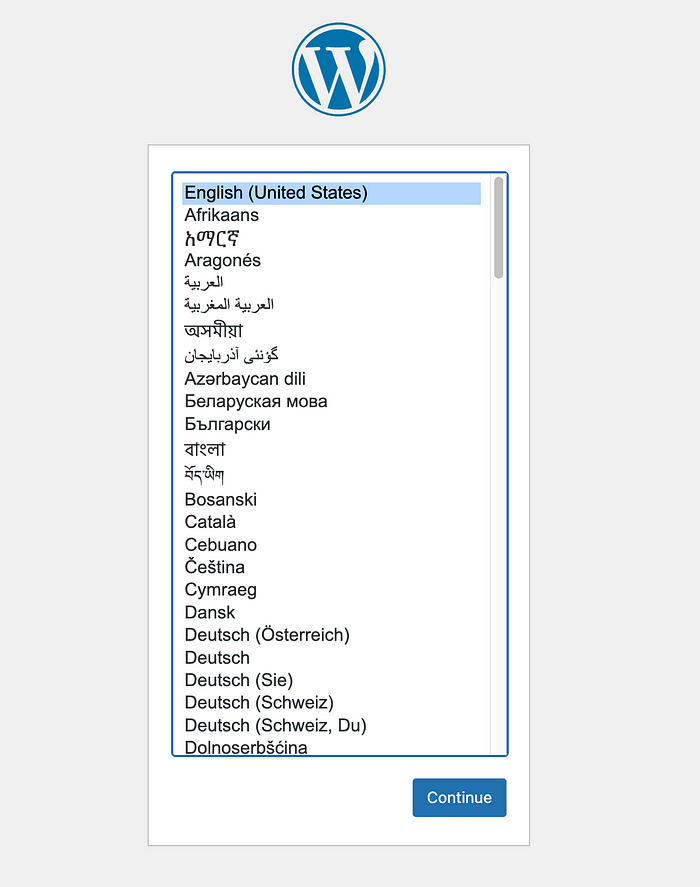
Click Continue
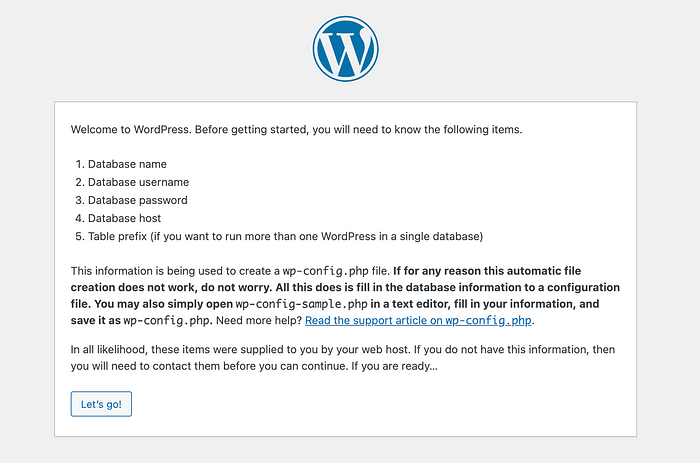
Click Let’s go!
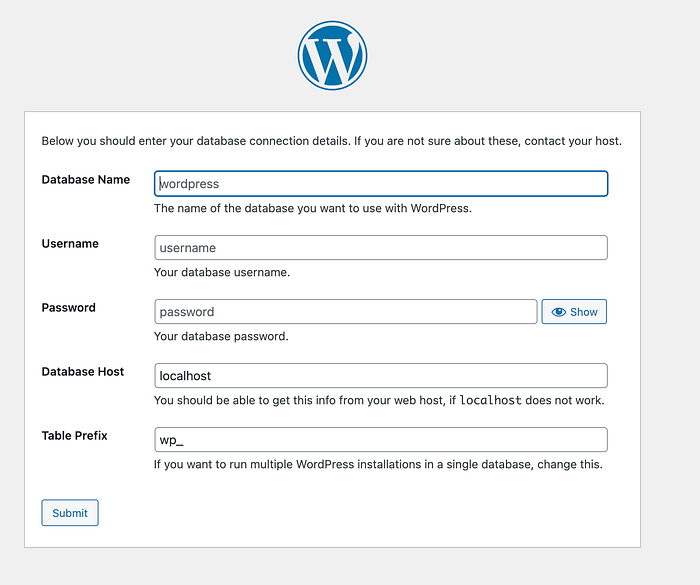
Remember the Database Name, Username and Password you saved somewhere earlier. These are the fields to enter them. You can leave Database Host and Table Prefix on default.
You should see this:
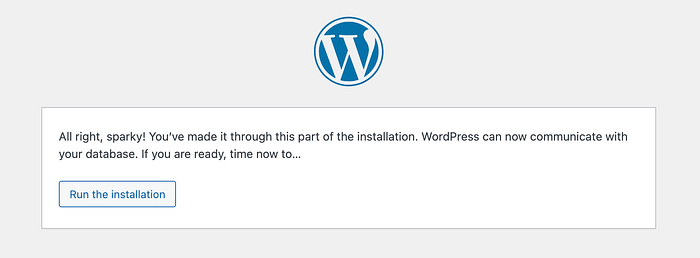
Click Run the Installation
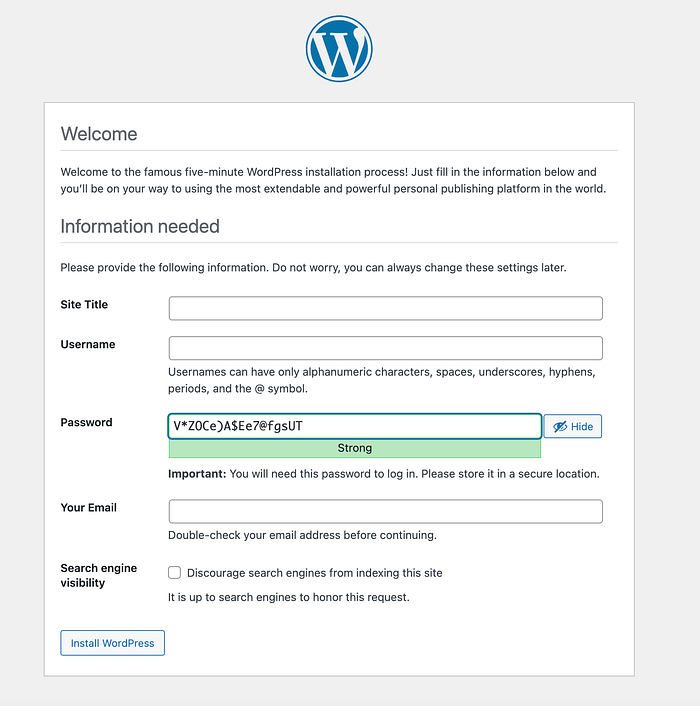
On this next page is where you set your website Title, Admin username and password to login to the backend(admin) so you can update your website when needed.
If you follow the process, it will take to you a Login page to login to the Admin.
Open a new table and go to the URL of your website. You will see the default WordPress website.
Aaaandd.. you are good to go!

